BBO Vugraph - The South American Zonal Trials
We have crossed the Atlantic Ocean to South America to visit the South American ...
We are back in New Zealand, for the final of the trials to select the team to represent the Kiwis in the Mixed Teams at the South Pacific Championships and at the World Bridge Games in 2024.
The two teams who have made it to this final stage are BERRINGTON (Ian Berrington/Fuxia Wen and Pam Livingston/Malcolm Mayer) and CARTER (Julie Atkinson/Patrick Carter and Jenny Millington/Barry Jones). The format is a 56-board match divided into four 14-board stanzas.
When we left things at the end of the first stanza, CARTER had built a 19-IMP lead, 46-27.
As usual, we start with a couple of problems. Firstly, with only your opponents vulnerable, you are West holding:
What action, if any, do you take?
Next, with neither vulnerable, you are sitting in the East seat with:
What action, if any, do you take?
While you consider those, we resume our coverage with the first board of the second stanza. This was a tricky combination for the E/W pairs…

Malcolm Mayer presumably did not have a forcing 3♦ bid available at his second turn, so he had to temporize with 3♣. Pam Livingston did not fancy 3NT with ♠A-x-x-x, so she advanced with a fourth-suit 3♠, but Mayer declined to bid 3NT with ♠Q-x and instead retreated to the 5-2 heart fit.
Jenny Millington (left) led the ♠J, covered all round. Livingston crossed to dummy in clubs and ran the ♦K, pitching a spade from her hand. Winning with the ♦A, Millington cashed the ♠10 and continued with a third round of the suit, declarer winning with the ♠9. When a trump was led, Millington hopped up with the ♥A and played a club, removing the late side-suit entry to dummy. Declarer had to dispose of her club loser on the second round of diamonds, but now she could not get back to hand to draw trumps without promoting North’s ♥9. E/W -50.
Let’s see how the Strong Club system copes…

Patrick Carter (right), who represented New Zealand at the 1988 World Team Olympiad and in the 1989 Bermuda Bowl, began with a game-forcing relay of 1NT. He then continued to relay at each turn until he new almost everything about his partner’s hand. Armed with that knowledge, he selected 3NT as the final contract.
There was no winning lead against this contract. Knowing nothing about declarer’s hand other than he had chosen to play 3NT facing a 4-5-0-4 shape, Fuxia Wen led the ♦6. Ian Berrington won with the ♦A and his diamond return was not exactly troubling for declarer. The defenders came to just the two red aces: E/W +460 and 11 IMP to CARTER, extending their advantage to 30 IMPs right out of the gate.
Game was never worse than a heart guess on our next deal, if you could reach the right denomination.

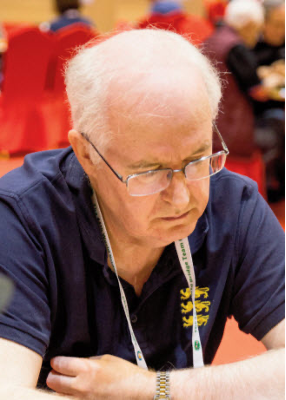
I can’t say that this West hand is a 2♣ opening in my book, but here it had the effect of landing Malcolm Mayer in the only game with any chance. Warned off a spade lead, Barry Jones (left) started with the ♣6, which was certainly inconvenient for declarer in terms of entries. Mayer won with the ♣A and cashed the top diamonds from dummy. He then overtook the ♣J and continued with two more diamond winners. Jones had to find three discards from the South hand. He could not afford club and it looked dangerous to be throwing away hearts, so he came down to the singleton ♠A. Meanwhile, North pitched once from each major.
Now declarer exited with a spade. Jones won with the ♠A and returned the ♥7. Jenny Millington won with the ♥K and returned a low heart. A winning guess would give declarer nine tricks but, when Mayer put up the ♥Q, the defenders cashed out the suit to put the contract one down. E/W -100
Now let’s see how the Strong Club fares…

One advantage of Strong Club methods is that the nature of the opener’s hand is not revealed as it would be in a natural system. Here, Julie Atkinson (right) started with her system strong bid and Pat Carter jumped to 3♣, showing game-forcing values and both minors. Atkinson waited with 3♦ and Carter now showed his shortage with 3♠. Whether West was about to bid 3NT or to commit to a high diamond contract, Fuxia Wen thought it was safe to help her partner with the opening lead. Atkinson’s redouble perhaps made Wen question the wisdom of her double, but it was too late to do much about that now.
All Wen had to do was to find the killing opening lead. She had three natural trump tricks, so East’s redoubled contract would bite the dust if the defenders could score two hearts. Would you have led the ♥A from that South hand?
Wen settled on the ♦9, which was all the help declarer needed. He won and immediately played three rounds of clubs, pitching a heart from dummy. A spade to the king won, and now declarer had to lose just three trumps and one heart. A magnificent E/W +760 and 13 IMPs to CARTER.
The Strong Club method also had an enormous influence on the outcome on the very next deal.

Malcolm Mayer showed his hand with a jump rebid in his six-card major. A couple of cue-bids then left Pam Livingston (left) with the first of this week’s problems. When she decided that her hand did not justify a move beyond game, that was the end of the auction.
Barry Jones led the ♦Q and, as we will see from the play at the respective tables, there are two ways to skin this particular cat. Here, Mayer won and played a spade at trick two. When he put up the king, that was one of his chances gone.
When the ♠K lost to North’s ace, Jenny Millington continued diamonds. Mayer won, cashed a high trump from his hand, crossed to the ♥J and ruffed a spade. A diamond ruff and a second spade ruff then left South is sole control of both black suits. When Mayer cashed his last trump, South had to discard from ♠Q and ♣Q-x-x in front of dummy. Pitching either suit was fatal, so twelve tricks were made. E/W +480.
Is it possible to hold a heart contract to eleven tricks? Yes, South has to lead a club at trick one. After that start, North can play a second club when he gets in with the defenders’ spade winner, removing the late entry to dummy.
Pat Carter opened a Strong Club and Julie Atkinson’s 2♣ response showed a balanced hand with game-forcing values. A series of relays allowed West to describe the key features of her hand to such an extent that Carter could choose the contract. Not only had they reached the good slam, but they had done so from the short trump hand. North had no lead to defeat the contract on this layout, as a club lead from that side of the table would give declarer a third trick in that suit.
Ian Berrington led a trump, and declarer won in dummy to lead the ♠10. When South followed with a low spade, Atkinson ran the ten and North won with the ♠J. Atkinson won the trump continuation in hand with the ♥J and ruffed a spade. Three rounds of diamonds, ruffing, allowed declarer to take a second spade ruff, brining down North’s ace. That gave declarer twelve tricks. E/W +980 and 11 IMPs to CARTER.
This was fast becoming a route and, by the midway point of the segment, the match score had advanced to 93-44 in favour of CARTER. The second half of the set was a completely different story…

Pam Livingston and Malcolm Mayer (right) had a controlled auction, and stopped at the five level when Blackwood revealed that they were missing a key card and the ♠Q.
Millington led the singleton ♥9 to the jack and queen, and Jones returned a low heart at trick two. Declarer can still make twelve tricks by ruffing with the ♠K and finessing North for the ♠Q. She can then later take the marked ruffing finesse against the ♥A to establish a parking place for her club loser. When Livingston ruffed the second round of hearts with the ♠9, Millington overruffed with the queen and declarer was soon claiming the eleven tricks for which she had contracted. E/W +450.
In the replay, Atkinson opened a Strong Club on the West hand, and Ian Berrington got into the auction with a natural 2♣ overcall. Carter forced to game with a natural 2♥, and he then jumped to 4♠ at his next turn to show his minimum. Now Fuxia Wen emerged from the deep grass with a 5♣ bid that would have been a cheap save (-300) against her opponents’ vulnerable game. The huge advantage of bidding 5♣ was revealed when Atkinson competed to 5♠. Now Carter found himself in the position posed by the last of this week’s problems. He was persuaded, probably by his singleton club, that he had enough to carry on to slam.
Berrington did not lead his singleton against 6♠, instead choosing the ♣3. Whilst declarer might make twelve tricks on a heart lead by the route described earlier, the club opening makes the task infinitely more difficult as the club loser still has to be dealt with. Making the contract from here requires unrealistic shenanigans. Needless to say, Atkinson took the pragmatic line of ruffing her club loser in dummy, cashing the ♠A, and running the ♠10 on the second round. With North holding the ♠Q that and the ♥A still to come, that was one down. E/W -50 and 11 IMPs to BERRINGTON.
BERRINGTON won the second half of the set 22-0, which meant that CARTER just edged the stanza 47-39. At the midway point of the contest, CARTER leads by 27 IMPs, 93-66.
We will be back soon with the best of the action from the second half of this playoff final