BBO Vugraph - The South American Zonal Trials
We have crossed the Atlantic Ocean to South America to visit the South American ...
This week we are at the Canterbury Park Racecourse in Sydney, New South Wales for the Australian Spring Nationals. The first of the two main events at this 10-day festival is the TBIB Open Teams, which attracted an entry of 39 teams. After a three-day qualifying event and full-day semi-finals, just two teams survived to contest the final. Those two teams were MILNE (Liam Milne, James Coutts, Andy Hung and Shane Harrison) and TRAVIS (Barbara Travis, Candice Ginsberg, Peter Reynolds and Howard Melbourne). The format is a 56-board match divided into four 14-board stanzas.
Only two problems for you this week. Firstly, with only the opponents vulnerable, you are North holding:
What action, if any, do you take?
Finally, with both sides vulnerable, you are sitting East with these cards:
What action, if any, do you take?
The opening stanza began quietly, TRAVIS leading 18-12 when the penultimate deal arrived at the tables. The contract and opening lead were the same in both rooms, but both sides were given opportunities to gain a swing on the deal.

Only a diamond lead gives the defenders a legitimate chance of defeating 3NT, but more of that later. Andy Hung led the ♥8 around to the ten, and now declarer has nine tricks with careful play. Needing three club tricks to bring his tally to nine, Peter Reynolds led the ♣9 and ran it when North followed with a low card. South won with the ♣J and former Australian junior international Shane Harrison (left) made no mistake, switching to the ♠Q. Whether declarer covered or not, the defenders were now destined to make three spade tricks to go with one club and the ♥A. E/W -100.
Evidently, this was not the ‘careful play’ mentioned earlier. Let’s see if declarer at the other table can do better.
After the same start, James Coutts won trick one with the ♥10 and played a club to the king. He then cashed the ♣A and exited with a third round of clubs. Barbara Travis won the ♣Q and could not now beat the contract. In fact, she switched to a low spade, allowing declarer to score the ♠K. Coutts cashed his minor-suit winners and claimed: E/W +600 and 12 IMPs to MILNE, who won the opening stanza 27-18.
Do you see how the defenders could have defeated this line of play?
North must deposit her ♣Q under the ace on the second round of the suit. (If declarer held the ♣J, would he not have finessed?) When declarer then tries to set up his third club winner, South wins with the ♣J and fires a spade through to skewer declarer’s king.
After the heart lead around to the ten, declarer can always make the contract via an avoidance play in the club suit that ensures the danger hand, South here, cannot gain the lead. Declarer leads a low club at trick two and, when North follows low, he wins with the ♣K. Declarer then returns to his hand with a top diamond in order to play a second round of clubs towards dummy. Again, if North follows with a low club, declarer wins with the ace and plays a third round, which North must win with the queen. Note that by leading clubs twice from his hand towards the A-K in dummy, North cannot divest herself of the ♣Q. If she plays the ♣Q on the second round of the suit, declarer plays low. However North defends, she is forced to win the defenders’ club trick, and South can never gain the lead.
I mentioned earlier that an opening diamond lead will beat the contract, but North must still defend well thereafter. Suppose declarer wins in hand and plays a club, North following low and declarer winning with the ♣K. If declarer crosses back to hand and plays a second club, North must play the ♣Q. Declarer can duck this trick to prevent South gaining the lead on the third round of the suit, but North still has a safe exit in clubs. Try as he might, declarer cannot now force North to concede a ninth trick to either the ♠K or the ♥10. Note that if North does not play the ♣Q on either the first or second round of the suit, he will be endplayed with it on the third round, forced to lead one of the majors and giving away the ninth trick.
Early in the second stanza, both North players were faced with the first of this week’s problems.
Andy Hung chose to defend 4♠. He began with two top hearts and delivered his partner’s ruff. The ♣A was the fourth defensive trick. Well judged! N/S +100.

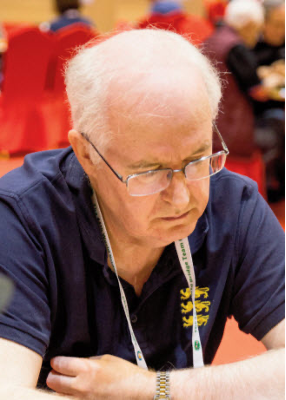
Barbara Travis (right) is a veteran of the Australian Women’s team, having made her debut way back in the 1981 Venice Cup, in the days when only five teams qualified. Now, eight European teams are invited to the big dance – Great Britain won the title as the only European representatives in 1981. (Only seven teams contested the Bermuda Bowl in that year of the famous USA-Pakistan final that launched Zia onto the world stage.) For the best part of four decades, Travis has been a regular member of the Australian squad (most recently at the 2017 Venice Cup), including the country’s two best performances, when they made it to the quarter-finals, in 1987 and on home soil in Perth in 1989.
On this deal, Travis chose to continue on to 5♣, which looks like the wrong decision with 4♠ failing on the heart ruff. Indeed, the defenders can take a spade, two diamonds and a diamond ruff to beat 5♣ by two. However, a strange thing happened on the way to the forum. For a start, no one doubled.
East led a spade, Coutts winning with the king and switching to hearts. Travis won, drew two rounds of trumps ending in dummy, and advanced the ♦J. Having already lost their diamond ruff, it would seem that the defenders are still destined to take two winners in the suit to beat the contract. However, when they allowed the jack to win the first round of diamonds, Travis needed no second invitation. She ruffed dummy’s spade, cashed the ♥K, and ruffed her remaining heart in dummy. Having eliminated both majors, she then exited with a diamond. Coutts won with the ace but, having only major-suit cards left, he was forced to concede a ruff-and-discard. Away went declarer’s last diamond and Travis claimed her contract: a spectacular N/S +400 and 7 IMPs to TRAVIS.
TRAVIS won the second stanza to lead by 9 IMPs, 52-43, at the midway point of the final. The first half of the third set was almost even, and the score had advanced to 70-62 when Board 9 arrived at the tables:
Slam hands do not come much more routine than this. Andy Hung opened 2NT and Shane Harrison set the suit with a four-level, two-up transfer, before rolling out RKCB. Taking a chance that his partner held a diamond control, Harrison jumped to slam after finding out that the partnership held all but one of the key cards. The hands could not have fit better. South cashed a high club at trick one and declarer quickly claimed the rest: E/W +980. What could go wrong?

The answer to that simple question was ‘Liam Milne’ (left). One of Australia’s brightest young prospects, this Kiwi native made his international debut as part of the New Zealand Junior team at the 2008 World Bridge Games in Beijing. Having crossed the Tasman Sea, he represented Australia at the 2011 World Youth Bridge Congress, finishing fourth in the Junior B-A-M Teams, and at the 2012 World Youth Championships, again just missing out on a medal, finishing fourth in the Junior Teams. Milne made his debut in the Australian Open team at the 2015 Bermuda Bowl in Chennai, and has quickly established himself as a regular member of the squad.
On this deal, Milne set the cat amongst the pigeons with what I have long described as a ‘routine weak two’, although I accept it would not be everyone’s cup of tea. Here, it worked like a dream.
Howard Melbourne is a former British junior international and, many years ago when I played junior bridge with him, he was nicknamed ‘Sydney’ because of his name, so it is perhaps fitting that he relocated to Australia. Too strong for any other action, he began with a takeout double of Milne’s weak 2♥ opening. Peter Reynolds was too strong for a jump to 4♠, so he started with an all-encompassing, strength-showing 3♥ cue-bid. Whether Melbourne intended his jump to 4NT as natural or Blackwood, Reynolds responded 5♣, presumably showing his one key-card. With no clue to his partner’s shape, what else could Melbourne do but jump to 6NT?
Declarer’s first clue that this was the wrong move was the double by James Coutts. The second was the ♣A lead, the sight of dummy, and the ♣K continuation. E/W -100 and a massive 17 IMPs to MILNE, who won the third stanza 40-20 to take an 11-IMP lead, 83-72, into the final 14-board set.
The fourth set proved to be one of few swings. MILNE had padded their lead to 100-78 with only three deals remaining, when both East players were faced with the last of this week’s problems.

What are the options? Pass, 1NT, 2♣ and perhaps 2♦? Howard Melbourne (right) chose to retreat to his chunky club fragment and there the auction ended. South led a trump, Melbourne winning in hand and leading a diamond towards dummy. South won with the ace and continued trumps. Declarer won and led a heart to the king and ace, North switching to the ♠K. Melbourne ducked, won the spade continuation, and led a diamond to the king. The ♥Q was cashed and a heart ruffed with the ♣J. Declarer exited with a diamond and, with the trump position virtually marked by North’s failure to ruff the ♦K earlier, declarer was sure to make the ♣Q-9 at the end for his contract. E/W +90.
After an identical start to the auction, Andy Hung chose to look for a penalty at the one-level, but that was always going to be a tough ask. The defence came to two clubs, a heart, the ♠A and one heart ruff, but that left declarer with eight tricks. E/W -360 and 10 IMPs to TRAVIS, reducing the deficit to just 12 IMPs with two boards to play.
That turned out to be as close as it would get. The penultimate deal was flat and MILNE picked up 7 IMPs on the last board of the set. MILNE won the final stanza 24-16 and a close-fought match 107-88.
Congratulations to Liam Milne, James Coutts, Andy Hung and Shane Harrison.
Next week, we be back in Sydney for the final of the other major event at the Spring Nationals, the Linda Stern Women’s Teams.